Are you learning to type in a foreign language for the first time? Do you frequently copy-and-paste special characters like é and wish there was a quick way to do so? Thankfully, Windows 10 makes it simple to add and switch between languages without the need to purchase a separate physical keyboard.
The following instructions will help you add new languages to Windows 10.
- Navigate to Windows Settings by clicking on the gear on the left side of the Start Menu.
- Click on “Time & Language”, then click on “Region & language” in the left sidebar.
- Under “Languages”, click “Add a language”.
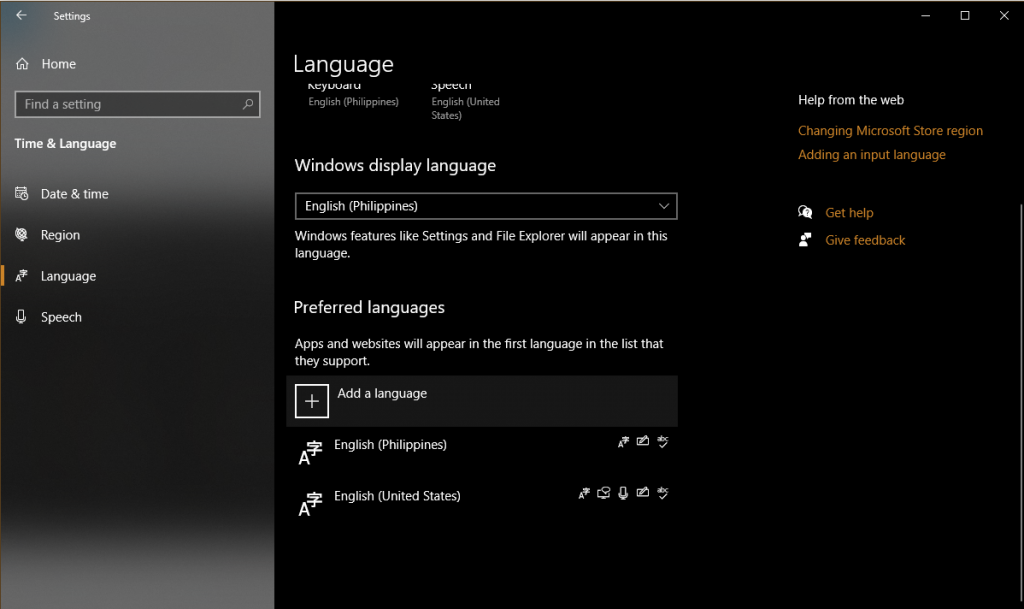
- Find the language that you would like to add. After clicking on it, you may be asked to specify a regional dialect. You will be returned to the “Region & language” page.
Following these steps will result in a new icon appearing next to the date and time in the bottom-right corner of your screen. It will almost certainly say “ENG” for English, which is the current keyboard language. This icon will open a window with a list of the languages that have been added so far. You can change your keyboard’s settings by selecting a language from this menu. You can also quickly switch languages by holding down the Windows key and pressing Space.
Some languages use a different keyboard layout by default than the QWERTY layout found on US English keyboards. Once you’ve made the switch to the new language, practice typing in Word, Notepad, or any other text-editing program. If the letters on the screen do not match the keys you type, the instructions below can help you resolve the problem.
- On the “Region & language” page, under “Languages”, click the language you just added, then click “Options”.
- Scroll down to “Keyboards”, then click “Add a keyboard”.
- Scroll down to “United States-International” and click on it. This keyboard follows the QWERTY layout but also supports some special characters in other languages.
- Under “Keyboards”, click the other keyboard, then click “Remove”.