
MetaMask is a browser extension designed to make accessing Ethereum’s Dapp ecosystem easier. It also serves as a wallet for holding ERC-20 tokens allowing users to access services built on the network via the wallet.
- It is a browser plugin that serves as an Ethereum wallet.
- Users can store Ether and other ERC-20 tokens in the MetaMask wallet.
- The wallet can also be used to interact with decentralized applications, or Dapps.
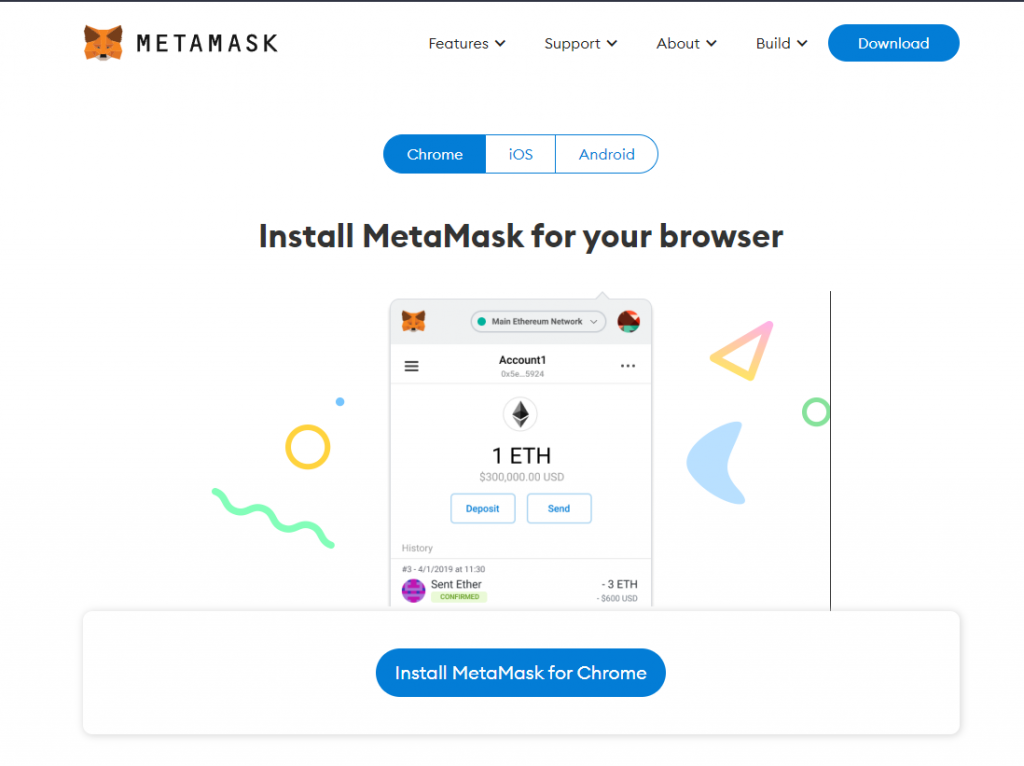
MetaMask can be downloaded on Chrome and Firefox, or on iOS and Android if you’re a mobile user. Firstly, you’ll want to head over to its Download page. From there, select whichever platform you’re using, and follow the steps to install it on your device.
Next, follow along with the setup specified by the app. Go ahead and click Create a Wallet. Write down the backup seed phrase somewhere secret (preferably not on an Internet-connected device). The seed phrase is very important so you must take care of it. Confirm that you’ve written them down on the next page.
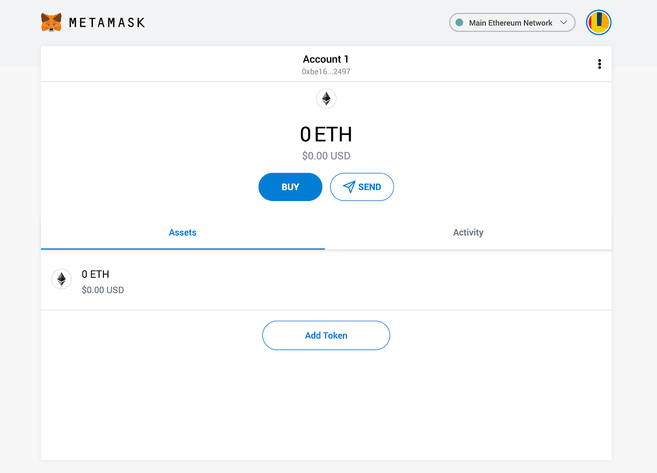
And that’s it! You should now see your wallet, ready to send and receive funds.
Connecting MetaMask to Binance Smart Chain (BSC)
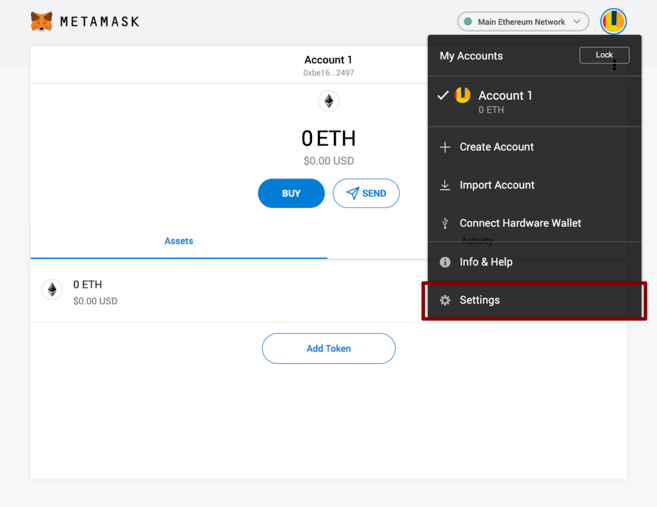
Access the settings to point the wallet towards BSC. Select it from the dropdown menu.
Locate the Networks Menu.
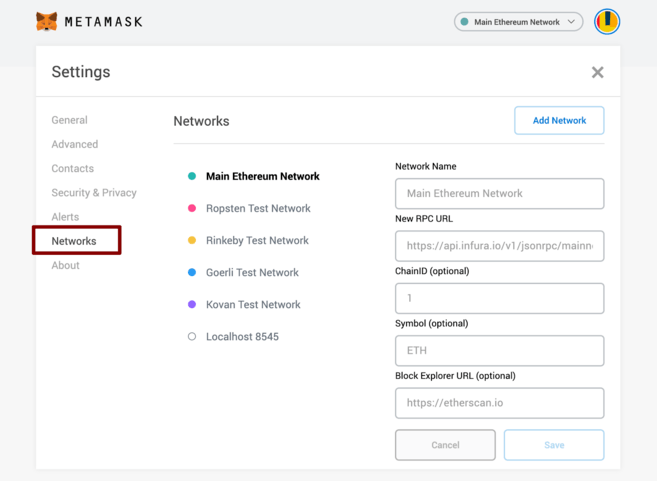
Click Add Network in the top-right corner to manually add the Binance Smart Chain. It’s important to note that there are two networks that we can use here: the testnet or the mainnet. Below are the parameters to fill in for each.
Mainnet
Network Name: Smart Chain
New RPC URL: https://bsc-dataseed.binance.org/
ChainID: 56
Symbol: BNB
Block Explorer URL: https://bscscan.com
Testnet
Network Name: Smart Chain – Testnet
New RPC URL: https://data-seed-prebsc-1-s1.binance.org:8545/
ChainID: 97
Symbol: BNB
Block Explorer URL: https://testnet.bscscan.com
Once you Save the Network and return to the main view, you’ll notice two things: the network has automatically been set to the one you just entered, and the units are no longer denominated in ETH, but in BNB.

We’ve connected to the testnet, but you’ll probably be connecting to the mainnet.
We’re now connected to the testnet, but you’ll be using the mainnet.
Testing Transactions (Testnet)
Hover over Account 1, and click to copy your address to the clipboard. Then, head to Binance Smart Chain Faucet and paste it into the form.
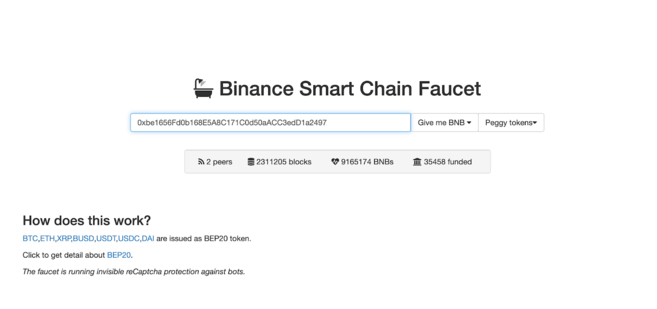
Click on the Give me BNB dropdown and select the amount you wish to receive. You might need to wait a couple of minutes, but the funds will show up in your testnet wallet in the few seconds.
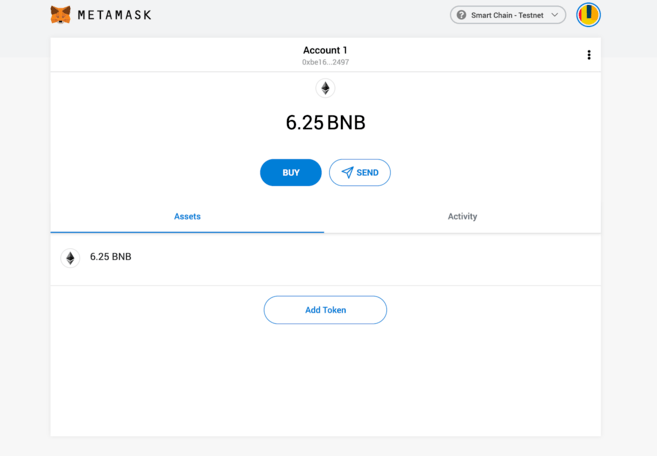
From here, we’ll try sending funds off somewhere to demonstrate how it works. We’ve just grabbed a random address from BscScan Testnet that we’ll donate them to. Go ahead and click Send.
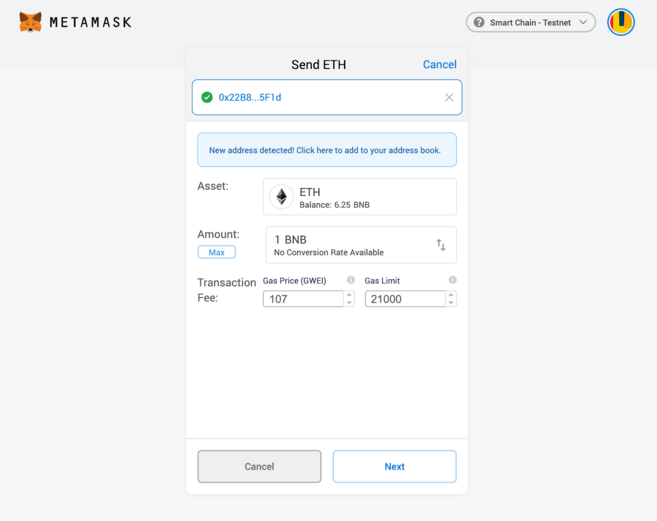
We’ve gone with a transaction of 1 BNB. Leave the fees untouched and hit Next. We then get one more chance to review the transaction – if everything looks fine, hit Confirm. And that’s it! You’ll get a notification informing you when your transaction settles.
Sources:
https://academy.binance.com/en/articles/connecting-metamask-to-binance-smart-chain
https://decrypt.co/resources/metamask
https://metamask.io/
https://metamask.io/download/